[Skin Care] Soap and Water Cleansing
 Soap and water cleansing is pretty much the most oldest cleansing method,but do we still think they are effective and clean our skin well? Some say no that they can be too drying,some say yes it’s pretty much refreshing for their skin and it’s okay.
Personally, I say it’s the best cleanser i have used so far,it’s refreshing,cleanses left over make up,dissolves oil and removes dirts. But one thing i will say is that they can be drying and you should always opt for the best soap that suits your skin type to cleanse your face, personally i use African black soap to cleanse my face because it does the major things a cleanser should do(i.e to dissolve dirt and oil,remove all traces of makeup and it’s refreshing).
Soap and water cleansing is not really for all skin type,it’s more refreshing for people with oily skin,but can be really drying for people with dry skin so you should either opt for a thicker cleanser that’s moisturizing or a moisturizing soap.
Sensitive skin should also beware with soap for washing face can cause redness,drying or burning opt cleanser scent free for your skin type,better still go for a claiming and moisturizing soap instead.
Body soap are totally different from facial soaps,because they can be really drying and soaps like antiseptic and deodorant soap are mostly drying. So when choosing a soap for cleansing, make sure you either go for facial soap or cleansing soap.
When using soap and water to cleanse there are basics:
. You don’t use soap directly on your face,you use the leather.
. After making the leather from your damp/wet soap,you massage leather over face.
. Massage over face few seconds to dissolve dirts and oil,wash off with lukewarm water and repeat cleansing again.
The basics are pretty simple i presume? But just as simple as they are,they are as important as that. Like putting soap directly on your face to wash it,bad because dirt and germs on your face are transferring back in soap and back to your face and the faom/leather won’t strip to much oil than normal.
Also don’t ever forget to remove make up and wash your hands before cleansing your face. If you don’t care for your skin,who will?
Tell me (via the comments) what you think also with using soap and water to cleanse your face,how does it feel?
STAY BEAUTIFUL IN AND OUT.

[Hair Care] TREATMENT FOR SPLIT ENDS
 THE HARMATTAN (winter season) in my country has really not been good to my hair, it falls when I’m combing, breaks at the tip when moisturizing it. Split end is a common problem faced by all especially when it gets to dry season of the year (harmattan or winter) it’s cold and dry and the moisture both in hair and skin is just sucked out.
As you all know beauty treatment be it face, skin, hair, or even make up and dressing should be done according to season requirement. Believe me i understand all the pain, anger attached to split end, it’s falls on your cloth or robe while dressing up and so on.
Now, I’m going to share with you some natural homemade treatment for split ends, I will also talk about some things that cause split ends(because believe me not only weather condition that causes it, there are other things we use or do to our hair that is actually causing the harm).
Some causes of split ends are highlighted for you below;
– HAIR STYLING TOOLS: blow dryer, coiling irons. straitening irons operate at high temperature level when used on the hair, high temperatures stripes the hair of moisture
– HAIR COLOURING PRODUCT and strong shampoo, also result in moisture loss. No matter how a hair dye claims to be herbal, they still have chemical that stripes the hair of it’s moisture content, only henna (lalee) doesn’t. For shampoo, some are harsh and strips the moisture, so when buying , always opt for a quality shampoos with a balanced hair ph. Level.
Lastly weather and pollution, weather which in my own case was the cause of my split end but that is now ancient as i have treated it.
Treatment
These few natural homemade recipes will not only treat your split end ,but will also prevent it, like I always say if you don’t care for hair, who will? Also the appearance of your hair brings the beauty in you out. There goes the recipes, I have used and still using to care for my hair. I hope it works for you just as it does for me
#avocado/olive oil/egg yolk/honey
Mix well in a blender and apply to hair from root to the damaged tip, leave in 4 to 5 hours or better still overnight, cover with shower cap. Wash off with Luke warm water and condition.
#coconut milk/coconut oil/honey
Mix well in a blender and apply to hair from root to tip cover with shower cap, leave In for 2hours or longer. Wash off with Luke warm water and condition.
#Egg yolk/olive oil
Mix well and apply to hair then cover with shower cap. Wash off with Luke warm water and condition.
#papaya /yoghurt
Remove papaya skin and seed and blend with a cup of yoghurt, apply to hair and cover with shower cap for 1hour. Wash off with Luke warm water and condition. Ripe banana can be replaced with papaya.
#olive oil/coconut oil/costar oil/jojoba oil
Mix well and warm in a pan and apply on hair for 2hour cover hair with plastic cap. Wash off with Luke warm water.
#mayonnaise/honey/egg yolk/aloe Vera gel
Blend together and apply on hair, cover with shower cap and leave for 2 hours. Wash off and condition.
#onions juice/honey
Mix well and apply on hair, cover with shower cap and leave for 1 hour or longer. Wash off with warm water and condition.
TIPS
Hair should be shampooed before applying any treatment to remove dirt and build up.
Never wash hair with hot water; instead Luke warm water. Hot water depletes the moisture in the hair.
Treatment can be left overnight for better result.
Treatment can customize with essential oil for herbal infusion.
Quantity of the treatment should be according to your hair length and volume.
Shower cap or plastic bag to cover hair to heat and hold hair in place (I use a black plastic bag because black is a conductor of heat.
Always trim your hair least once in two months.
Hope you find these remedies useful. If you have other remedy (ies) that you know, please do share them with us via the comment section. You can also send your comments or suggestions by tweeting at me @Ellasbeautytips and at my Facebook page (ellasbeautytips).
“If you don’t care for your hair, who will?”
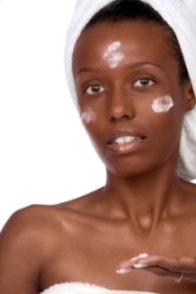
7 Steps To Doing A Facial At Home….Like A Pro
 WANT THOSE PESKY PIMPLES GONE AND HAVE A CLEAR COMPLEXION, IF YES THIS ALTERNATIVE APPROACH IS JUST FOR YOU.
I already posted an article on DIY at home facial but at the end of my post, I promised to post an alternative approach which is DIY at home facials like pro. The method is quite similar to the DIY AT HOME FACIAL but just slightly different because this approach is simply like the professional facial we get in salons/spa which includes cleansing, exfoliating, steaming, extracting,masking,TONING AND MOISTURIZING.
Here is how to do it, and also you can have a facial party with your friends by actually doing it for one another, this will actually make it look more spa like, don’t you think?
THINGS YOU’LL NEED
ANTI BACTERIAL SOAP/GEL
A FACIAL CLEANSER
FACIAL EXFOLIATING SCRUB
FACIAL MASK
SKIN TONER
FACIAL MOISTURIZER
A HEADBAND
A WASH CLOTH
A TOWEL
ANTISEPTIC
LARGE POT/STEAMER
TEA TREE OIL
EXTRACTING TOOLS/LANCET
CLEAN COTTON WASH CLOTH/COSMETIC WIPE
STEP ONE: CLEANSING
Pull your back from face using hair band, remove all traces of make up with make-up remover then wash your hands with anti-bacterial soap/gel and cleanse your face with cleanser for your skin type. Wash off all traces of cleanser with warm water and pat dry.
STEP TWO: EXFOLIATING
Exfoliate using your exfoliating scrub in circular motion, gently massage in to skin. Wash off with Luke warm water and then pat dry.
STEP THREE: STEAMING
you either use a steamer if you have one,or you boil water in big pot when it is boiling, you place your head over it not too close so that it wont burn your face, remember it is the steam you need to open your pores and then prepare the skin for extraction. place a towel over your head so that the steam wont escape, steam for 15 minutes or when you feel your pores is ready to be picked.You can also customize your steaming with essential oils/herbs after steaming is completed you wash your face with warm water and pat dry.
STEP FOUR: EXTRACTING
THERE are two methods of extracting pimple, the first involves the use of tissues and the second involves using a pimple extractor to remove acne.
USING TISSUE TO EXTRACT ACNE
This method comes in after the steam have been done,you need the areas with blemish properly steamed to open pore.
Take a tissue and wrap around the finger after the thumb for both fingers, use the wrapped fingers and start to apply pressure to areas where there is acne.UNTIL THE PIMPLES POPS OUT, AND THE ENTIRE PUS ARE OUT. YOU STOP WHEN YOU PRESS AND BLOOD COME OUT NOT PUS.
REPEAT IN OTHER AREA AND CLEAN PUS WHEN PRESSING WITH WIPE/TISSUE
ALL PIMPLE REMOVED, THEN WASH FACE WITH LUKE WARM WATER AND ANTISEPTIC AND APPLY TEA TREE OIL [I WILL GO WITH TEA TREE OIL WILL KILL THE REMAINING GERM LEFT IN PORES AND HELP HEAL], WASH HANDS CLEAN WITH SOAP AND DISPOSE OF THE TISSUES
USING AN EXTRACTOR TOOL
THIS METHOD INVOLVES THE USE OF PIMPLE EXTRACTOR.THIS INSTRUMENT IS MADE OF STAINLESS STEEL,AND HAS A LOOP ON ONE END AND A NEEDLE POINT ON THE OTHER.BUT THIS TOOLS SHOULD BE USED VERY CAREFULLY.
AFTER STEAM YOUR FACE,YOU DISINFECT THE EXTRACTOR WITH ALCOHOLIC, START EXTRACTING PIMPLES BY SQUEEZING THEM USING THE LOOP SIDE OF THE EXTRACTOR.IF IT FILLED WITH PUS USE THE NEED POINT TO PUNCTURE AND AID THE PROCESS.
AFTER puncturing, start squeezing out the pimples by pressing the metal loop around the [pimple region, move it front and back to take out pus completely
After you are done extracting one pimple, wipe the region with tissue /wipe and clean the extractor in warm water and wipe it with tissue. Then proceed to remove the next pimples.
After you are done extracting all the pimple, wipe your face with astringent and cleanse with an antiseptic cleanser ,then rinse off with with Luke warm water and pat dry with a clean towel.
Finally dispose of the used tissue and disinfect the extractor.
Tissue or extractor can also be used to remove blackhead and whitehead, make sure you use gentle pressure. Keep doing this every week and you will prevent acne to a great extent.
STEP FIVE: MASQUE
AFTER CLEANSING AND ALREADY DRY IT, THIS WHEN FACE MASK US APPLY ACCORDING TO SKIN TYPE LEAVE ON FOR 15 -20 MINUTES.THEN RELAX UNTIL TIME IS UP, REMOVE MASK WITH WARM WATER AND WASH CLOTH.
PAT DRY FACE AND LIE DOWN THEN COVER YOUR FACE WITH THE COTTON WASH CLOTH DAMP IN COOL WATER FOR 5 MINUTES TO CLOSE UP PORES.
STEP SIX: APPLY TONER AND MOISTURIZER ACCORDING TO SKIN TYPE AND SUNSCREEN IF HEADING OUT DOOR.
TIPS
YOU CAN APPLY TEA TREE OIL ON ZIT TO AID THE HEALING PROCESS.
KEEP THE EXTRACTING TOOLS CLEAN BEFORE AND AFTER USE.
MAKE USE OF HAIR PIN OR PAPER CLIP IN PLACE EXTRACTING TOOL JUST
MAKES USE OF THE LOOP SIDE AND SANITIZE BEFORE AND AFTER USE.
USE SKINCARE PRODUCT ACCORDING TO SKIN TYPE.
MAKE TIME FOR FACIALS ONCE A WEEK/ TWICE FOR PROBLEMATIC SKIN AND WILL PREVENT ACNE TO A GREAT EXTENT.
WARNING
NEVER USE UNSANITIZED TOOL TO EXTRACT ACNE.
DON’T FORCE OUT ANY ZIT WHEN NOT COMING OUT, INSTEAD YOU STEAM THE AREA IN OTHER TO SOFTEN IT BEFORE YOU THEN EXTRACT IT.
EXTRACTING STEP SHOULD ONLY BE DONE ON MINOR ACNE NOT SEVERE, CYSTIC ACNE OR INFLAMED ZIT INSTEAD YOU OPT FOR THE DIY AT HOME FACIAL THAT DOESN’T INVOLVE EXTRACTING, OR VISIT YOUR DERMATOLOGIST.
How To Give Your Self A Spa Like Facial At Home
For deep cleansing and a definite improvement in your skin tone, try an at home facial. Applying this facial once a week will definitely be a treat for you and your skin, will also notice an improvement in your complexion. Simply follow these step by step instructions for a fabulous facial to recreate the benefits of spa treatment in the comfort of your own home.
THINGS YOU’LL NEED
ANTIBACTERIAL HAND SOAP OR GEL
A FACIAL CLEASNER
MAKE UP REMOVER
FACIAL EXFOLAITING SCRUB
FACIAL MASK
SKIN TONER
FACIAL MOISTURIZER
HAIR BAND
A WASHCLOTH
A TOWEL
STEP ONE
Wash your hands with anti-bacterial soap, bacterial/dirt on your hands block pores causing spot.
STEP TWO
Pull your hair back from your face with the hair band.
STEP THREE
Remove all traces of make up with make-up remover, then cleanse your face with a cleanser suitable for your skin type, then rinse face with Luke warm water leaving no traces of cleanser.
STEP FOUR
Use an exfoliating scrub suitable for your skin type scrubbing in circular motion, don’t scrub harshly massage in to skin gently then wash off with warm water and wash cloth and pat dry with a clean towel.
STEP FIVE
Apply mask suitable for your skin type and leave on for 20 minutes or the time stated to be left for, wash off the mask with warm water and wash cloth then pat dry with a clean towel.
STEP SIX
Apply a toner suitable for your skin type dry skin will benefit from a tonic toner same as normal and sensitive skin, oily skin use an astringent toner and combination skin needs to use an astringent toner on the t-zone and tonic in the other areas.
STEP SEVEN
Apply a moisturizer suitable for your skin type oily skin needs light weight lotion and oil free, dry skin needs a heavy rich cream, sensitive skin should opt for something calming and unscented, normal use choose a nourishing moisturizer to maintain it and combination should choose according to skin type also.
WARNINGS
ALWAYS APPLY SKINCARE MEANT FOR YOUR SKIN TYPE ONLY, IF YOU DONT KNOW YET YOU CAN READ A POST I POSTED ON SKINTYPE TEST AND THEN KNOW WHERE YOU FALL INTO TO ENABLE YOU TO CHOOSE THE SKIN CARE PRODUCT BE IT HOME MADE OR ORGANIC PRODUCT BECAUSE THEY HAVE A REASON FOR IT BEING SPECIFICALLY FOR THAT SKIN TYPE, TO BE ABLE TO TREAT IT ACCORDINGLY.
TIP
IF YOU REALLY WANT TO ALSO IMPROVE YOUR SKIN DAILY, HAVE A SKIN CAREROUTINE TWICE DAILY. TO WASH/CLEANSE, TONE AND MOISTURISE SHOULD BE A DAILY THING NOT ONCE A WEEEK OR ANY TIME YOU FEEL LIKE, SHOULD BE TWICE DAILY
MAKE TIME ALWAYS FOR YOUR AT HOME DIY FACIAL EVERY WEEK, IF YOU DON’T CARE FOR YOUR SKIN WHO WILL?
AFTER DOING YOUR FACIALS DON’T APPLY MAKEUP LET YOUR SKIN REST AND BREATH, COMMON GIRL GIVE IT A BREAK YOUR FACE AINT A COLOURING BOARD OR BETTER STILL YOU DO IT AT NIGHT WHILE GOING TO BED TO EVEN HELP YOUR SKIN REST AND REPLENISH ITSELF.
PULLING YOUR HAIR BACK WITH HAIR BAND IS REALLY IMPORTANT WHILE DOING YOUR FACIAL DON’T EVER INGORE BECAUSE ENABLES YOU TO DO WHAT NEEDS TO BE DONE WEL,SO ALSO THAT DIRTS AND BACTERIA IN YOUR HAIR WILL NOT BE GOING BACK IN TO YOUR SKIN.
REMOVING OF MAKUP BEFORE CLEANSING IS VERY NECESSARY DON’T EVER LEAVE IT ON BEFORE CLEANSING YOUR FACE, SERIOUSLY YOU ARE DOINGLOTS OF HARM TO YOUR SKIN, IF YOU DO THAT.PLEASE FOR THE BENEFIT OF YOUR SKIN DON’T.
JUST AS IMPORTANT AS IT IS TO FOLLOW STEP 1,2 IT’S NECESSARY TO ALWAYS CLEANSE YOUR FACE BEFORE ANY SKIN CARE PRODUCT IS APPLY .
FACIALS CAN BE DONE ONCE A WEEK OR TWICE FOR A VERY PROBLEMATIC SKIN [ACNE PRONE AND REALLY OILY SKIN].
ALTERNATIVE APPROACH WHICH IS THE DIY AT HOME FACIAL LIKE A PRO, WHICH INCLUDES ALL OTHER STEPS STATED ABOVE BUT WITH THE EXPECTIONS OF THE STEAMING AND EXTRATION STEP.THIS AT HOME FACIAL LIKE A PRO WILL SHOW YOU HOW TO DO FACIALS LIKE A PROFFESSIONAL DONE IN SPA ‘S, HOW TO STEAM YOUR FACE WELL TO MAKE IT READY FOR THE EXTRATION STEP, AND TO ALSO PROPERLY EXTRACT THOSE PERKY PIMPLE, WHITEHEADS AND BLACKHEADS.
LETS NOW ALL START SAVING TO BUY A STEAMER AND GETTING READY FOR MY POST,JUST KIDDING YOU DONT NEED TO DO THAT BECAUSE I ALWAYS HAVE A WAY OF FINDING ALTERNATIVES AND IN THIS CASE I HAVE LOTS.
STAY BEAUTIFUL IN AND OUT, STAY TUNE FOR DIY AT HOME FACIAL LIKE A PRO.
How To known Your Skin Type
 Do you know your skin type?
Skin is the largest organ in the human body, covering and protecting every single surface of your body. The secret to beautiful, healthy skin is to understand how your skin functions because this will help you to treat it correctly, keep it strong and supple. Your skin is made up of two layers, epidermis and dermis.
What your skin type?
There is no point in spending a fortune on expensive skincare product if you buy the wrong one for skin. The key to develop a skin care routine is to known your skin type first, to develop a better understanding of your skin and what will suit it best. You can start by answering these questions below, then add up your score to know which of the skin type you fit into.
1. How does your skin feel when you cleanse it with a cream cleanser?
A.RELATIVELY COMFORTABLE
B.SMOOTH AND COMFORTABLE
C.SOMETIMES COMFORTABLE, SOMETIMES ITCHY.
D.QUITE DRY
E.OILY IN THE T-ZONE AND SMOOTH IN OTHERS
2. HOW DOES YOUR SKIN FEEL WHEN YOU CLEANSE IT WITH FACIAL WASH AND WATER?
A.TIGHT AS IF IT’S TOO SMALL FOR YOUR FACE
B.SMOOTH AND COMFORTABLE
C.DRY AND ITCHY IN PLACES
D.FINE/ QUITE COMFORTABLE
E.DRY IN SOME AERAS AND SMOOTH IN OTHER
3. HOW DOES YOUR SKIN USUALLY LOOK BY THE MIDDLE OF DAY?
A.FLAKY PATCHES APPEARING
B.FRESH AND CLEAN
C.FLAKY PATCHES AND REDNESS
D.SHINY /GREASY
E.SHINY/GEASY IN THE T-ZONE
4. HOW OFTEN DO YOU BREAKOUT IN STOPS?
A.HARDLY EVER
B.OCCASSIONALLY, PERHAPS BEFORE OR DURING PERIOD
C.OCCASSIONALLY
D.OFTEN
E.OFTEN IN THE T-ZONE
5. HOW DOES YOUR SKIN REACT WHEN YOU USE FACIAL TONER?
A.IT STINGS
B.NO PROBLEM
C.STINGS AND ITCHES
D.FEELS FRESHER
E.FEELS FRESHER IN THE T-ZONE /SOME AREAS BUT STINGS IN OTHERS
6. HOW DOES YOUR SKIN FEEL WHEN YPOU APPLY A THICK/HEAVY CREAM?
A.IT FEELS VERY COMFORTABLE
B.COMFORTABLE
C.SOMETIMES FEELS COMFORTABKLE,OTHER TIME FEELS IRRITATED
D.MAKES YOUR SKIN VERY OILY
E.OILY IN THE T-ZONE, COMFORTABLE ON THE CHEEKS
Add up A’s, B’s, C’s, D’s and E’s. Your skin type is the one that has the majority answer
Mostly A’s = your skin type is dry
Mostly B’s = your skin type is normal
Mostly C’s = your skin type is sensitive
Mostly D’s = your skin type is oily
Mostly E’s your skin type is combination
NOTE: YOU KNOW HOW YOUR REACT TO SKINCARE PRODUCT THAN ANYONE SO CHECK YOUR SKIN TYPE BEFORE YOU BUY ANY SKINCARE PRODUCT,EVEN IF YOU ALREADY KNOW OT STILL IMPORTANT YOU DO THE TEST ONCE AWHILE BECAUSE OUR SKINTYPE TENDS TO CHANGE WITH TIME FOR SOME NOT NECCESSARILLY EVERYONE AND ALSO REMEMBER THAT MANY FACTORS AFFECT OUR SKIN TYPES, SUCH AS WEATHER,EMOTIONS, HORMONES AND STRESS and this will cause your skin type to be in a constant state of fluctuation
FOR EXAMPLE WHEN ONE IS GRADUALLY APPROCHING TEENAGE LEVEL ONE’S SKIN IS BOUND TO CHANGE LOTS OF BREAKOUT,OILLNESS BECAUSE THE BODY IS GOING THROUGH SOME HORMANAL CHANGES AND THE SEBACEOUS GLAND PRODUCE MORE OIL THAN NORMAL,ALSO AS TIME GOES ON FOR SOME AFTER TENEGE LEVEL THEIR SKIN CHANGE AND SOME DONESN’T.
KNOWING YOUR SKIN TYPE IS IMPORTANT,I HOPE YOU NOW KNOW WHAT YOUR SKIN SEEKS, BECAUSE IF YOU DON’T CARE FOR IT WHO WILL?
Benefits Of African Black Soap

African black soap

African black soap
African Black Soap contains roasted plantain skin ashes for its very gentle exfoliating properties to remove dead skin cells. It may help reduce the appearance of fine lines. Black soap is also known for its excellent hydrating qualities. Organic Hempseed Oil and unrefined pure Shea Nut Butter provide deep moisture. This soap is multipurpose – you can use it as a conditioning shampoo. For centuries, both the Ghanaians and Nigerians of West Africa have used African Black Soap to help relieve acne, oily skin, clear blemishes and various other skin issues. African Black soap has also been used to achieve beautiful skin. Africans have also used this natural soap for bathing and washing their hair. It’s excellent for removing make-up too. Black soap will leave your skin silky soft and clear. Brief history of ORGANIC African Black Soap:
If you haven’t used this soap before, it’s a little bit crumbly in nature and softer than most soaps. It has a delicate texture & a natural earthy smell. It is not oily or scented. Black Soap or African Black Soap also known as Anago Soap, ose dudu or Alata soap, and originates from West Africa. It has been used for centuries in countries like Ghana and Nigeria. Its methods and secrets have been passed down from generation to generation to keep the soap close to mother nature and to avoid exploitation and imitations. This African Black Soap is not the mass produced African Black Soap sold all over the market.
African Black Soap comes from plantain skins originally. Plantain is a rich source of vitamins A and E and iron. (plantain is a popular food in Africa and other parts of the world. It looks much like a banana, but it’s bigger and longer.) The skin of the plantain is dried to a specific texture under the hot African sun and then roasted in a clay oven. The heat must be kept precisely at a constant temperature in order to achieve a particular color, texture and smell. The roasting of the plantains determines the color of the soap. The longer the plantains are roasted, the darker the soap. Next, the roasted skins of the Plantain are mixed with Palm oil and Palm Kernel oil to form the soap. These oils are in their purest form – without refining – and they make for a HIGHLY nourishing soap! Different African tribes make their own variations of Black Soap, as do separate Countries and their recipes are highly guarded.
Our African Black Soap is a great base ingredient for creating your own personalized soaps and can be melted and customized by adding moisturizing ingredients, such as unrefined shea butter, and essential oils. It can also be made into a liquid soap by adding water to it.
USING BLACK SOAP
Break off a bar-size piece from the bulk, then press it to shape with your hands, or use it as is. Rub the bar between your hands (or on a washcloth would also work), then rub your soapy hands on your skin and hair. (If you rub the bar on your hair, it will get hair stuck to the bar.) Black soap absorbs water easily, so keep it from sitting in water or it will dissolve away. The soap holders covered with little vertical fingers work well. Because this soap is softer than commercial soap, it comes off the bar more easily, so less rubbing of the bar is needed to release enough soap. When you start another bar, just push the old soap sliver onto the new piece and the two will easily unite; leaving no waste. Also recommended: mix a pea size amount of the organic-shaped soap with a small amount of water until liquid. You will have less waste.
STORAGE OF BLACK SOAP
Pure traditional African black soap is a soft milled soap and has a very high natural glycerin content. As a result, it readily absorbs moisture from the air. It must be stored in a dry location or in a sealed plastic bag or it will become soft as it absorbs moisture. Black soap exposed to the air will have a thin white colored film. This film is not mold, it is caused by absorption of water from the air. This can be avoided by keeping the soap in a dry location away from moisture until ready for use. The film is not harmful.
MAKING BLACK SOAP
Traditional Black Soap contains mainly water, cocoa pod ashes, plantain skins ashes, and palm oil, cooked together to form soap.
Tiny coconuts from the oil palm are stripped of their oily husk.
The oil filled husks are packed into a hand press. In the center of the press is a huge threaded shaft.
The heavy steel top to the press is put in place.
Muscle power forces the orange Palm Oil from the fiber.
The same pure Palm Oil is used in cooking and soap making.
The Palm Oil is heated to ready it for the soap making.
The Cocoa Pod grows directly from the branch. It is packed full of seeds (cocoa beans). When the pods have been emptied, they are burnt to produce CocoaPod Ashes.
The CocoaPod Ashes and/or plantain skins ashes are cooked with water to make them dissolve.
The ash water is added to hot Palm Oil.
The mixture of Palm Oil and Cocoa Pod Ashes is cooked and stirred. Soap is formed, foaming to the surface.
Hot soap is scooped off and placed on a cooling table.
BENEFIT OF ABS.
• African Black Soap has a deep cleansing effect. •African Black Soap suits all skin types. It is also good for babies and sensitive skins.
• African Black Soap is very sharp and does not leave a film on your skin.
• African Black Soap restores skin damaged from excessive use of bleaching creams and chemicals.
• African Black Soap heals chronic eczema, acne, pimples, freckles and dark spots.
•African Black Soap cleans deep into pores to activate the regeneration and rejuvenation of the skin.
•The antiseptic effect of African black soap prevents rashes, itch, dry and scaly skin from developing.
•African Black Soap like any other good African Black Soap does not have animal testing involved. Beware of Imitation “BLACK SOAP”
Contrary to the name, African Black Soap is actually a brownish-black color.
The addition of Iron Oxides and other colors and dyes is what makes a commercial, chemical based soap “Black”, thus passing by the name “Black Soap”.
“Black” or Brownish-black Soaps should not contain any chemicals or dyes.
“Traditional” hand processed African Black Soap does not have a hard texture, Instead, black soap will look somewhat like molded brownish-black clay.”
Source: Earthsong
if you don’t care for your skin,who will?
stay beautiful in and out
Best Oils For Your Hair

Argan Oil
. ARGAN OIL
Often referred to as the Miracle Oil or Liquid Gold, Argan oil is a fantastic natural sunscreen, heat protectant and an intensive repair treatment all in one! In fact, if you’re looking for a multi-purpose natural hair product, this is something you should definitely try. It will improve the elasticity of your dry, brittle hair, help reduce the frizziness of your locks making them softer and more manageable, repair damaged tresses and reduce further breakage as well as aid hair growth! Sounds unbelievable? No wonder Argan oil is one of the most popular natural oils for hair!

. Coconut Oil.
. COCONUT OIL
A well known secret of hair growth, beautiful healthy hair and healthy scalp – this natural oil for hair is a product ladies swear by! Give it a go in case you’re into organic hair care and love to experiment with natural hair products or in case you wish to try something new. Coconut oil works wonders for both dry and oily scalp, promoting that healthy balance, helping your damaged hair regain its natural shine and vitality, protecting it from both inside and outside!

Grape seed Oil
. GRAPESEED OIL
Next on my list of fantastic natural hair care products to take into your consideration is, of course, the super-popular Grapeseed oil! This odorless, non greasy oil is widely-known as a natural sunscreen for hair but can be used as a carrier oil (in case you’re into making your own concoctions) or applied as a hair/scalp treatment. It helps restore scalp’s natural balance and is an ideal anti-dandruff treatment for all of those who, for some reason, can’t tolerate coconut oil, plus a fantastic hair repair and strengthening treatment, thanks to vitamin E and linoleic acid.

Pomegranate seed Oil
. POMEGRANATE SEED OIL
Rich in antioxidants and essential fatty acid named Punicic Acid, Pomegranate seed oil should be on your list of natural oils for hair to try out in case you’re in the market for a natural hair product that could help you repair and protect your dry and damaged tresses. Use it alone or mix your very own DIY infusion to help your hair regain its silky smooth texture and shine and fear not – pomegranate seed oil is actually a very popular ingredient of many rejuvenating skin and hair care products and is proven to work wonders for both skin and hair in need of some serious repair.

Tea Tree Oil
. TEA TREE OIL
Looking for a natural hair product to soothe your itchy scalp and help you have the hair of your dreams? Why not give Tea Tree oil a shot, then? Its anti bacterial and anti fungal properties are well known within the cosmetic industry plus there’s also that fantastic cleansing effect you’ll love. Simply add it to your homemade shampoo or conditioner to crank up their cleansing ability without the harsh drying effects of commercial products.

Sheabutter
. SHEA BUTTER
Not sure if this one falls under the category of natural oils for hair but, hey, coconut oil happens to be of thick consistency too and it’s still technically an oil so I’m just going to go with the good ol’ “don’t fix it if it ain’t broken” and list it anyways! Why? Because it’s fantastic! Simply warm it up to use as a hot oil treatment and you’ll be hooked!

Amla Oil
. AMLA OIL
Last but not the least, this fab natural oil for hair definitely deserves to be a part of your natural hair care! Also known as Indian Gooseberry oil, this fantastic ingredient is well-loved by ladies all over the globe. The “why’s” of it are actually quite fantastic too and I bet you’ll surprised to know this oil isn’t only a great conditioner, traditional hair growth treatment and dandruff remedy but also a well kept beauty secret you’re going to want to make your own in case you’re stressing about your grays! Yes, ladies, it’s true – when applied regularly, Amla oil can restore pigmentation and help you bid your premature graying problem goodbye!
If you don’t care for your hair, who will?
Readers’ Choice: The Best 18 Mineral Makeup Products
. No. 1: Merle Norman Luxiva Purely Mineral Makeup, $25
TotalBeauty.com average member rating: 9.8*
Why it’s great: “This mineral powder stays on all day long and looks great until I remove it at night. I don’t have to reapply during the day; and that means a lot! One jar lasts me three months. The brush that you apply it with is easy to clean. I clean mine about every two weeks. Just wet it down, and then I use a liquid makeup remover and rinse, and then I wash it out with a liquid hand soap.” — anmarie, TotalBeauty.com member. No. 2: GloMinerals glo Finishing Powder, $33.50
TotalBeauty.com average member rating: 9.8*
Why it’s great: “I love this powder! I have oily skin and this powder soaks up oil while feeling light and fresh on my face. It lasts all day and doesn’t darken my makeup like some other powders do. I love the sleek-looking compact, definitely worth the [money]!” — alikat217, TotalBeauty.com member. No. 3: Amazing Cosmetics Velvet Mineral Powder, $32
TotalBeauty.com average member rating: 9.7*
Why it’s great: “It’s so light that you don’t even realize you are wearing makeup, but yet it covers perfectly and matches your skin tone. I hated to wear foundation because my skin is oily, but ever since I started using this, I enjoy [wearing] makeup!” — minny1115, TotalBeauty.com member. No. 4: Jane Iredale PurePressed Base, $48
TotalBeauty.com average member rating: 9.3*
Why it’s great: “I love Jane Iredale PurePressed Base and have been using it for two years. It works as a foundation, powder and sunscreen. It gives a light, even coverage, and looks very natural. Some tips for better results: Be sure to get the right shade for you (there are many available); a light coverage is all you need, so avoid applying too much; use the Handi brush or a similar brush (not the pad that comes in the compact); and lightly use a mister or hydrosol after applying (it sets the powder and it seems to melt right in).” — bigelove, TotalBeauty.com member. No. 5: MAC Mineralize Skinfinish/Natural, $24.50
TotalBeauty.com average member rating: 9.3*
Why it’s great: “This is my holy grail powder. The coverage is light to medium and leaves a satin finish that doesn’t ever look chalky — just natural. I use this powder over my Laura Mercier Tinted Moisturizer and my skin has never looked better. I … prefer this formulation to other MAC powders which have a tendency to leave my very fair complexion looking ghoulishly pale. I highly recommend this product.” — luyuan, TotalBeauty.com membe. No. 6: Raw Natural Beauty Raw Minerals Active Veil SPF 18, $25
TotalBeauty.com average member rating: 9.1*
Why it’s great: “Honestly, I’ve never used anything that has made my skin soft and healthy, and it has improved my skin so much over time, I now wear this alone and feel so pretty. I would recommend this to anyone.” — 00angel2pet00, TotalBeauty.com member. No. 7: Colorescience Suncanny Foundation Brush SPF 20, $60
TotalBeauty.com average member rating: 9*
Why it’s great: “A beautiful powder foundation in a variety of shades. I would also like to add though, the ColoreScience has Sunforgettable, which has an SPF of 30. It comes in perfectly clear (translucent) so it works for most skin colors. They also have perfectly clear sparkle, for those nighttime or special events when you want a little sparkle. The regular [ones] give you a very natural-looking glow — and you can’t beat an SPF 30.” — CCulpepper, TotalBeauty.com member. No. 8: Philosophy The Supernatural Airbrush Canvas SPF 15, $35
TotalBeauty.com average member rating: 9*
Why it’s great: “I’m not a big foundation girl due to the way it feels on my face but this stuff I love! Philosophy’s [The] Supernatural foundation has the full coverage [of] a liquid foundation but in an easy-to-use powder form. I have an oily T-zone and with other foundations or powders, it tends to look a little cakey towards the end of the day, but with Supernatural I have none of that. My skin looks flawless all day and … [it] has an SPF 15 too! The packaging is great, super portable, you can carry it in your bag without having to worry about it spilling, and there is a built-in mirror on the top of the cap.” — macabregirl74, TotalBeauty.com member. No. 8: Philosophy The Supernatural Airbrush Canvas SPF 15, $35
TotalBeauty.com average member rating: 9*
Why it’s great: “I’m not a big foundation girl due to the way it feels on my face but this stuff I love! Philosophy’s [The] Supernatural foundation has the full coverage [of] a liquid foundation but in an easy-to-use powder form. I have an oily T-zone and with other foundations or powders, it tends to look a little cakey towards the end of the day, but with Supernatural I have none of that. My skin looks flawless all day and … [it] has an SPF 15 too! The packaging is great, super portable, you can carry it in your bag without having to worry about it spilling, and there is a built-in mirror on the top of the cap.” — macabregirl74, TotalBeauty.com member. No. 9: Laura Mercier Mineral Powder SPF 15, $35
TotalBeauty.com average member rating: 8.9*
Why it’s great: “Before this, I would never have considered wearing makeup with this kind of coverage daily. But this is so light and quick to apply! I’m not giving it a 10 [only] because even though it can be applied really fast, it does take a while to get the hang of it and you really, really need a good brush. Otherwise it doesn’t work half as well.” — Leticiasouza, TotalBeauty.com member. No. 10: Jane Iredale PureMatte Finish Powder, $36
TotalBeauty.com average member rating: 8.9*
Why it’s great: “I am not a youngster but not quite an oldster either and finishing powders have always alluded me. This is an excellent product and does not cake or turn color. It finishes, just what it is intended to do, and lasts for a long time. The color is true and is gentle to your skin, just like it says it is …” — Judieb, TotalBeauty.com member. No. 11: Pur Minerals 4-in-1 Pressed Mineral Makeup/Foundation, $24.50
TotalBeauty.com average member rating: 8.8*
Why it’s great: “I was impressed with Pur because the color was true to their descriptions and the ease of applying and the time saved was incredible. It truly is a great concealer as I have spider veins, pimples, and this does a much better job than Bare Escentuals — and I don’t use loose powder anymore. Great value and lasts throughout the day.” — Tracey777, TotalBeauty.com member. No. 12: Bare Escentuals i.d. bareMinerals 2-piece Powder Foundation & Brush w/SPF 15, $47
TotalBeauty.com average member rating: 8.8*
Why it’s great: “I was very skeptical but after reading about it in numerous magazines I tried it for myself and absolutely LOVE it. The infomercials are no lie. After switching from a chemical-filled foundation to a natural product such as [this], my skin is less oily, rarely breaks out and the redness is gone. I love the way it covers without the look of makeup.” — fueysers, TotalBeauty.com member. No. 13: Joppa Minerals Full Coverage Foundation, $16
TotalBeauty.com average member rating: 8.5*
Why it’s great: “I cannot say enough good things about this product. I had always shied away from foundation because it never stayed on my oily skin and the oil always caused it to change colors. Not so with this foundation. It has helped clear up most of my acne, so much so that people are now asking me how I maintain my ‘flawless’ skin. I have this product in soft coverage and I apply it lightly with Joppa’s brush. The result [is] a ‘no makeup’ yet perfect face.” — coinma, TotalBeauty.com member. No. 14: Ulta Mineral Powder Foundation, $14
TotalBeauty.com average member rating: 8.5*
Why it’s great: “Ulta Mineral Powder Foundation is tops in my book! The color matches my skin well; it blends well; and it’s even soothing! It beat other mineral foundations, hands down. It wears long, needing no touch-ups throughout a whole day of work. The value for the price is excellent.” — sanavid66, TotalBeauty.com member. No. 15: Bare Escentuals Mineral Veil, $19
TotalBeauty.com average member rating: 8.4*
Why it’s great: “This is one of the few things I find that [is] perfect. The product does exactly what it [is] supposed to do — make your skin look flawless and glowing. The powder is so thin and smooth that it just sets your entire look. The texture is so creamy on your skin, it doesn’t look like you have makeup on at all but your face just glows from health. One of the best things ever.” — Maggiemango, TotalBeauty.com member. No. 16: Arbonne About Face Mineral Powder Foundation, $34
TotalBeauty.com average member rating: 8.2*
Why it’s great: “This foundation has great coverage. I have some issues with acne scars and this covers [them] right up. There’s a good selection of colors as well so you’re sure to find your color. The brush is a nice high quality that is soft on your skin and holds just the right amount of product. The foundation itself is very smooth and light feeling.” — MikkiG, TotalBeauty.com member. No. 17: Mary Kay Mineral Powder Foundation, $18
TotalBeauty.com average member rating: 8.2*
Why it’s great: “I have fair skin that just gets whiter and whiter [throughout] winter. I had a hard time finding a foundation that matched my skin tone until I found Mary Kay Mineral Foundation. It is easy to apply, it blends in with my skin, it stays all day, and it looks natural.” — pchopcroft, TotalBeauty.com member. No. 18: Joppa Minerals Morning Dew Foundation, $16
TotalBeauty.com average member rating: 8.2*
Why it’s great: “This is by far the greatest mineral makeup I [have] ever tried. It doesn’t make me itch and it stays in place all day long. It gives you a nice glow because of the bronzer that is in it. It looks great on the lightest skin tone to the darkest!” — monkeybreath333, TotalBeauty.com member. Check for health and beauty benefit of mineral makeup in our previous post. Culled from total beauty
Why Buy Mineral Makeup?
. Health and Beauty Benefits
Mineral makeup has really taken off in the past twenty years. At first, everyone was skeptical about a makeup that claimed to provide so many benefits in one jar. This article discusses some of the health and beauty benefits of wearing mineral makeup you might not have known.
Mineral makeup comes with claims that they work for all skin tones and skin types. The mineral makeup hides is supposed to hide imperfections and help women put forth their best face possible…and with the growing popularity of mineral makeup, it seems it’s doing just that.
Even though the powder looks much like other foundational makeup at first glance, a deeper look reveals that mineral makeup is quite different from the run of the mill makeup we are used to putting on. Mineral makeup is made up of just that-minerals and not filler.
The minerals that make up the basis of most mineral makeup are:
· Titanium dioxide
· Mica powder
· Iron oxides (for color)
These minerals are found naturally and are ground into a fine powder. As natural products, there is less of a chance of skin irritation with mineral makeup. We, as women, are used to skin irritations from makeup. All of the chemicals and dyes in most over-the-counter beauty products clog our pores and inhibit our skin from breathing.
Furthermore, most makeup cakes after prolonged wear. Many foundations show streaks when we become overheated and begin to perspire. No one wants to have their makeup run. When it cakes, it is easier to see fine lines and wrinkles in our skin. What a mess!
With natural mineral makeup, that is not a problem. Only a small amount of the mineral powder is applied to the face for all over coverage. The use of a Kabuki brush allows for quick and complete coverage for all skin types and tones.
Mineral makeup has several benefits:
· It provides complete and light coverage
· Hides fine lines and wrinkles
· Goes on smooth and stays smooth even on hot days
· Provides shades that complement any skin tone
· Adds a natural glow to the skin
Mineral makeup is perfect for those who need to use hypoallergenic makeup. The iron oxides, besides providing color also act as a natural sunscreen for the skin. The sun’s rays can damage the delicate skin of our face and cause us to wrinkle prematurely.
Have you ever kept makeup for a long time and wondered if you should still use it? Makeup can become contaminated from continued use with the same brushes. Mineral makeup resists bacterial buildup so you can keep it for a long time without worrying about the powder getting old. For those with sensitive skin, skin disorders, or who just have trouble finding a shade to fit your skin tone, mineral makeup is a viable option.
Culled from bing.
How To Wash Your Face Well
Many of you cleanse your face regularly right? That better be answered as a yes and not a no! You think you may be washing your face properly…but are you? It is very important to read these steps to see if you are following proper skin-cleansing procedures!
1. If you have long hair, pull your hair off your face and use a headband to hold stray hairs back.
2. Wash your hands with warm water and anti-bacterial soap to remove all dirt and germs from your hands.
3. Make sure your running water is at a luke warm temperature, not too hot to burn or irritate your skin and not too cold that it can’t kill the bacteria on your skin.
4. Gently dampen your face and neck, and use a dime size amount of a gentle cleanser, working the product into your skin in a circular motion with your fingertips.
Note: remove all makeup with makeup remover,oil or wipes before cleansing your face.
5. Make sure you cleanse your neck as well,its important to care for it and also remember to remove any traces of makeup on your neck,you know foundation /powder should go beyond your chin level.
6. After cleansing your face and neck for 60-90 seconds, rinse cleanser off with warm water.
7. Turn water to freezing cold and splash a few times on your face and neck, shocking the skin and freezing the pores shut after they have been opened and cleared with warm water. The cold water will help prevent bacteria from entering the skin from having been enlarged.
8. Gently pat face dry with a clean, soft hand towel.
9. Hydrate your skin with an oil-free moisturizer and follow with eye cream.
10. If you’re on a topical medication with acne, apply at this time.
11. Cleanse your face EVERY morning and night.
12. Wash your face after shampooing and conditioning since these products tend to clog the pores with their heavy ingredients for hair care.
Follow these steps to have the cleanest, freshest skin possible! Skipping one of these steps can cause acne to form on your skin or worsen. So start following our steps to washing your face and see how your skin improves. If you don’t care for face,who will?